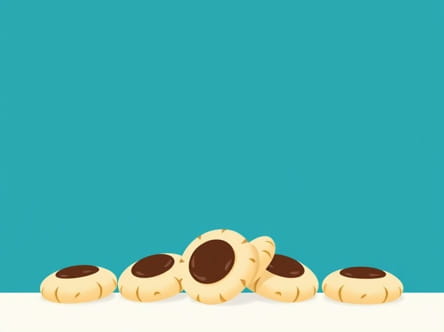
If you’re searching for a delightful and simple treat that combines the comfort of homemade cookies with the irresistible flavor of Nutella, look no further than Nutella thumbprint cookies. These cookies are soft, buttery, and perfectly sweet, with a center filled with rich, creamy Nutella. Whether you’re baking for the holidays, a party, or just a cozy weekend afternoon, this recipe is a sure crowd-pleaser. The thumbprint design not only looks charming but also serves as the perfect nest for a generous spoonful of Nutella. With just a few ingredients and easy steps, you can bring a batch of these mouthwatering cookies to life in your own kitchen.
Ingredients for Nutella Thumbprint Cookies
These cookies require common pantry ingredients, making them an easy and accessible baking option. The key to a perfect batch is using quality butter and making sure your Nutella is smooth and easy to spoon.
- 1 cup (2 sticks) unsalted butter, softened
- 2/3 cup granulated sugar
- 2 large egg yolks
- 1 teaspoon pure vanilla extract
- 2 cups all-purpose flour
- 1/4 teaspoon salt
- 1/2 cup Nutella (or more as needed)
Step-by-Step Instructions
1. Preparing the Dough
Start by creaming the butter and sugar together in a large mixing bowl. Use a hand mixer or stand mixer on medium speed until the mixture becomes light and fluffy, usually about 2-3 minutes. This step is crucial as it adds air to the dough and gives the cookies their soft texture.
Next, add the egg yolks and vanilla extract to the creamed butter and sugar. Mix until fully incorporated. Gradually add the flour and salt to the bowl, mixing just until the dough comes together. Be careful not to overmix, as this can make the cookies dense and tough.
2. Shaping the Cookies
Preheat your oven to 350°F (175°C) and line a baking sheet with parchment paper. Scoop out tablespoon-sized amounts of dough and roll them into smooth balls using your hands. Place them about 2 inches apart on the prepared baking sheet.
Use your thumb or the back of a small spoon to gently press an indentation into the center of each dough ball. This will be the spot where the Nutella will go later. Be sure not to press too hard or all the way through the dough just deep enough to hold the filling.
3. Baking the Cookies
Place the baking sheet in the oven and bake for 10-12 minutes, or until the edges are just starting to turn golden. The cookies should remain soft and not become too brown. Remove the cookies from the oven and let them cool on the pan for a few minutes before transferring them to a wire rack.
If the indentations have puffed up slightly during baking, gently press them again with a spoon while the cookies are still warm. Allow the cookies to cool completely before filling them with Nutella.
4. Filling with Nutella
Once the cookies are cool, use a small spoon or piping bag to add about half a teaspoon of Nutella into each indentation. If your Nutella is too firm, you can microwave it for 10-15 seconds to soften it slightly and make it easier to spoon.
Let the Nutella set for a few minutes before serving. If desired, you can refrigerate the cookies briefly to help the filling firm up more quickly.
Tips for Perfect Nutella Thumbprint Cookies
- Chill the dough: If your dough is too soft to roll, refrigerate it for 20-30 minutes before shaping. This helps the cookies hold their shape better while baking.
- Use a piping bag: For a cleaner look, transfer Nutella to a piping bag or plastic sandwich bag with the tip cut off to fill the indentations neatly.
- Try toasted nuts: Add chopped hazelnuts or almonds around the edge of the cookie for a crunchy texture and extra flavor.
- Double the batch: These cookies are usually eaten quickly. Consider doubling the recipe if baking for a group.
Variations and Customizations
Nutella thumbprint cookies are a great base for creativity. If you love to experiment in the kitchen, here are a few fun ways to make them your own:
Chocolate Cookie Base
Add 1/4 cup of unsweetened cocoa powder to the dough for a double chocolate twist. This complements the Nutella beautifully and gives the cookies a rich chocolate flavor.
Gluten-Free Version
Use a 1: 1 gluten-free flour substitute if you need a gluten-free option. Make sure the flour blend includes xanthan gum or another binding agent to maintain texture.
Holiday Decoration
Top the Nutella filling with festive sprinkles, crushed candy canes, or a drizzle of white chocolate for a holiday-ready dessert that looks as good as it tastes.
Fruit and Nut Combo
Top the Nutella with a small slice of strawberry, banana, or a whole hazelnut to add an extra layer of flavor and visual appeal.
Serving Suggestions
Nutella thumbprint cookies pair perfectly with a cup of coffee, hot cocoa, or a glass of milk. They also make wonderful gifts when packaged in a decorative tin or wrapped in parchment and ribbon. Whether served at a party, tucked into a lunchbox, or enjoyed as a midnight snack, they’re a guaranteed hit.
Because they are small and bite-sized, these cookies work well for dessert platters and cookie exchanges. Arrange them with other holiday cookies like sugar cookies, snickerdoodles, or gingerbread men for a complete dessert spread.
Storage and Shelf Life
Store Nutella thumbprint cookies in an airtight container at room temperature for up to 5 days. For longer storage, place them in the refrigerator for up to 10 days. You can also freeze them for up to 3 months just be sure to layer them between sheets of parchment paper and use a freezer-safe container to avoid damage.
When ready to eat, allow the cookies to come to room temperature or gently warm them in the microwave for a soft, fresh-baked feel.
Nutella thumbprint cookies are the perfect combination of simple ingredients and indulgent flavor. Their rich, buttery dough and creamy chocolate-hazelnut center create a dessert that feels both classic and unique. Easy to make and fun to customize, these cookies are an excellent choice for any occasion. Whether you’re new to baking or a seasoned pro, this recipe delivers consistently delicious results and is sure to become a favorite in your cookie collection.