Drawing an earthen pot is a great way to begin practicing basic shapes, curves, and symmetry. These traditional clay vessels, often used for storing water or grains, have a timeless appeal with their smooth, rounded forms and natural earthy tones. Whether you’re a beginner artist or guiding children through their first steps in drawing, an easy drawing of an earthen pot can be both educational and relaxing. With just a pencil, eraser, and some paper, you can follow simple steps to bring this everyday object to life with elegance and charm.
Understanding the Shape of an Earthen Pot
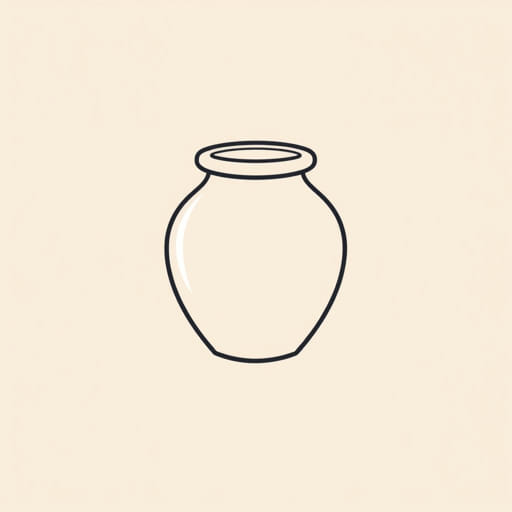
Basic Forms and Geometry
The shape of an earthen pot is based primarily on a combination of ovals, circles, and curves. It usually consists of a wide body, a narrow neck, and a rounded or flared mouth. Some may have a base or rim detailing, but most follow a symmetrical structure. Understanding how to break the pot down into simple geometric components is essential for an easy and successful drawing.
- Body: Usually oval or elliptical in shape.
- Neck: A cylinder or narrow curve that connects the body to the mouth.
- Mouth: A slightly flared circle or oval, often with an opening.
- Base: Sometimes flat or gently curved to support the pot.
By visualizing the pot in parts, the process becomes more manageable, especially for those new to drawing.
Materials You’ll Need
Simple Tools for Beginners
You don’t need fancy supplies to create an easy drawing of an earthen pot. These basic materials will work just fine:
- Pencil (preferably HB or 2B for soft lines)
- Eraser (kneaded or soft eraser for clean corrections)
- Drawing paper or sketchbook
- Optional: Black pen or colored pencils for outlining or finishing touches
These tools are ideal for practicing and making corrections as you develop your confidence in sketching the form.
Step-by-Step Guide to Drawing an Earthen Pot
Step 1: Start with the Main Body
Begin by drawing a vertical guideline in the center of your page. This will help maintain symmetry throughout the drawing. On either side of the line, sketch a large oval or ellipse for the main body. The body should be widest at the middle and taper slightly as it nears the top and bottom. Use light strokes so you can easily adjust the shape if needed.
Step 2: Add the Neck
Above the main body, draw two vertical lines close together to form the neck. Connect them at the top with a curved line. The neck should be narrower than the body and should smoothly continue the curve upward from the body’s top edge. It should look like a narrow cylinder sitting atop the oval base.
Step 3: Draw the Mouth
At the top of the neck, draw a horizontal oval or ellipse to represent the mouth opening. Make sure it aligns with the neck and appears natural in proportion. The top ellipse should slightly overlap the top curve of the neck to suggest depth and realism. If desired, you can thicken the rim slightly to give the pot a more detailed and three-dimensional look.
Step 4: Add the Base
Below the body of the pot, draw a small, slightly flattened oval to represent the base. The base keeps the pot grounded and balanced in the drawing. Like the mouth, this should be symmetrical and aligned with the central vertical guide.
Step 5: Refine the Outline
Once you’re happy with the overall structure, go over the entire pot outline with a darker pencil or pen. Smooth out any uneven curves and erase the internal guideline. Make sure the curves are clean and the symmetry is consistent on both sides of the pot. This step brings clarity and confidence to your drawing.
Adding Details and Shading
Surface Texture and Patterns
Some earthen pots have decorative bands, geometric patterns, or simple etched lines. If you want to personalize your pot drawing, add horizontal lines or traditional motifs near the neck or center. Keep the patterns simple for an easy drawing experience.
- Dots and lines
- Swirls or wave patterns
- Floral or leaf motifs
- Cracks or natural clay marks
Basic Shading Techniques
To give your earthen pot a realistic look, you can add shading to indicate light and shadow. Decide the light source direction (left or right) and gently shade the opposite side of the pot. Use the side of your pencil for softer tones and blend with a finger or tissue.
- Darker tones on one side for shadow
- Lighter areas to suggest highlights
- Gradual blending for a three-dimensional effect
Shading helps in giving depth and volume to the drawing, even if it’s a simple sketch.
Tips for Beginners
Common Mistakes to Avoid
- Forgetting symmetry use a centerline as a guide.
- Drawing too heavily start with light pencil strokes.
- Skipping basic shapes break the pot into ovals and lines first.
- Overcomplicating the design keep it simple and clean.
Practice drawing the pot multiple times from slightly different angles or in various sizes to build confidence and control.
Practice Makes Perfect
Like any artistic skill, drawing improves with repetition. Don’t worry if your first earthen pot isn’t perfect. Focus on shape and proportion. Try filling a sketchbook page with multiple versions, experimenting with different curves, heights, and patterns.
Benefits of Drawing Traditional Objects
Cultural and Artistic Connection
Earthen pots have been used across many cultures for centuries. Drawing them not only helps you improve as an artist but also connects you to the history of handmade crafts and everyday design. They are symbols of simplicity, tradition, and sustainability, making them meaningful subjects for artistic expression.
Skill Development
Creating an easy drawing of an earthen pot helps develop several foundational art skills:
- Symmetry and balance
- Shape observation
- Proportional accuracy
- Shading and line control
These skills are transferable to many other drawing subjects, such as vases, bottles, or even the human form.
Drawing an earthen pot may seem simple at first, but it offers a rich opportunity to explore form, balance, and cultural symbolism. With easy-to-follow steps and a focus on gentle curves and symmetry, anyone can create a beautiful sketch of this timeless object. Whether you’re looking to improve your drawing skills, teach beginners, or simply enjoy a quiet moment of creativity, the earthen pot is an excellent subject to start with. As you continue to practice, you may find new ways to personalize your work with patterns, shading, and character. The journey of learning art begins with shapes as humble as a pot made from the earth.