Installing chipboard flooring is a popular and cost-effective solution in both residential and commercial construction. It offers a smooth surface, uniform thickness, and is commonly used as a subfloor beneath carpet, vinyl, or laminate. One of the essential components of a successful chipboard flooring installation is choosing the right glue. The correct adhesive not only ensures the longevity and stability of the flooring but also helps prevent creaks, gaps, and other issues that can arise over time. When selecting glue for chipboard flooring, understanding product types, application methods, and usage considerations is crucial for a successful outcome.
What Is Chipboard Flooring?
Chipboard flooring, also known as ptopic board flooring, is made by compressing wood chips and resin into a dense, flat sheet. It is often tongue-and-groove, which allows for tight joints and easy installation. Chipboard is widely used in construction due to its affordability, ease of handling, and compatibility with most flooring finishes. However, it is less tolerant of moisture compared to other materials like plywood, making glue selection even more important to protect against expansion and separation.
Why Glue Matters for Chipboard Flooring
The adhesive used in chipboard flooring installations plays a major role in securing the boards to each other and to the joists or subfloor. A strong bond reduces movement, eliminates squeaks, and increases the floor’s durability. Without the right glue, flooring can become unstable over time, especially in high-traffic areas or environments with humidity fluctuations.
Functions of Flooring Glue
- Stability: Reduces flex and prevents boards from moving.
- Moisture Resistance: Protects joints from moisture ingress that may cause swelling.
- Sound Dampening: Minimizes creaks and hollow sounds underfoot.
- Longevity: Ensures flooring remains intact for years without repair.
Types of Glue for Chipboard Flooring
Not all adhesives are suitable for chipboard flooring. Choosing the right type can depend on environmental factors, installation preferences, and budget. Below are the most common glue types used for chipboard flooring:
PVA Wood Glue
Polyvinyl acetate (PVA) wood glue is one of the most popular choices for chipboard tongue-and-groove joints. It is easy to apply, affordable, and bonds well with wood-based materials. For best results, use a waterproof or water-resistant PVA variant, often labeled as D3 or D4 grade, to provide added protection against moisture.
Construction Adhesive
Construction adhesives such as polyurethane-based glues provide strong, flexible bonds. These adhesives are suitable for attaching chipboard flooring to joists or concrete bases. They are also resistant to movement and moisture, making them ideal for heavy-duty applications. However, they often require a caulking gun for application and can be harder to clean up than PVA glue.
Foam-Based Adhesive
Foam adhesives are gaining popularity due to their ease of use and moisture resistance. These are typically applied with a gun or nozzle and expand slightly to fill gaps between boards, creating a tighter seal. Foam adhesives are ideal for high-humidity environments or when working with uneven subfloors.
Hybrid Polymer Glue
This is a newer class of adhesives that combine the benefits of PVA, polyurethane, and silicone. Hybrid polymer glues offer strong initial tack, elasticity, and high bonding strength. They also resist water and chemical degradation, making them a premium choice for more demanding applications.
How to Apply Glue to Chipboard Flooring
Proper glue application is just as important as choosing the right product. A poor technique can lead to delamination or squeaky boards over time. Here are the general steps for gluing chipboard flooring:
Preparation
- Ensure the subfloor or joists are clean, dry, and level.
- Choose a day with stable temperature and humidity to avoid expansion issues.
- Have all materials ready, including glue, applicators, spacers, and clamps if needed.
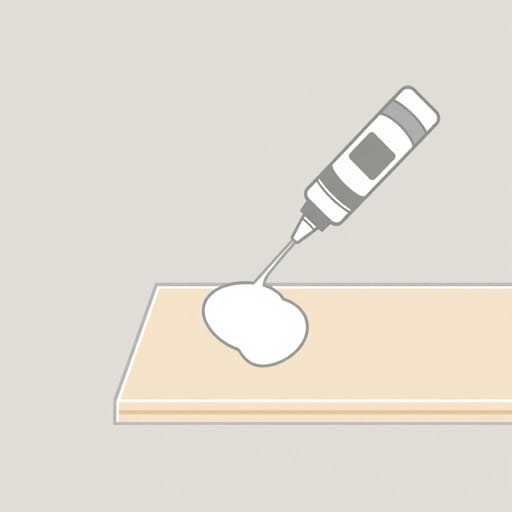
Applying to Tongue-and-Groove
- Run a continuous bead of PVA glue along the upper groove of the board.
- Insert the tongue of the next board firmly into the glued groove.
- Tap gently using a block to avoid damaging the edges.
- Clean off any excess glue before it dries.
Adhering to Joists
- Apply construction adhesive directly to joists before laying down each board.
- Place the board firmly onto the joist and secure with screws or nails.
- Maintain even pressure to ensure good contact between surfaces.
Factors to Consider When Choosing Glue
Choosing the best glue for chipboard flooring depends on a variety of factors, including environment, traffic, and installation method. Below are some aspects to think about before purchasing glue:
Moisture Exposure
If the area is prone to humidity or damp conditions (like basements or kitchens), using a waterproof or moisture-resistant glue is essential. In dry areas, standard wood glue may suffice.
Installation Time
Some adhesives offer fast curing times, which is beneficial for quick installations. However, fast-setting glues offer less flexibility for adjustment during installation. Make sure the setting time matches your working speed and experience level.
Clean-Up and Maintenance
PVA glue is relatively easy to clean with water before it dries. Polyurethane and foam-based adhesives, on the other hand, can be more difficult to remove and may require solvents. Consider your workspace and how easily glue spills can be managed.
Common Mistakes to Avoid
Improper gluing can lead to long-term problems with chipboard flooring. Here are some common mistakes to steer clear of:
- Overusing glue: Excess glue can squeeze out and create a mess or interfere with joint fit.
- Skipping glue entirely: Some may think nails or screws alone are enough, but glue adds critical strength.
- Not wiping excess glue: Dried glue can be difficult to remove and may affect finishes later.
- Using the wrong type: Always check compatibility with chipboard material and installation conditions.
Cost of Glue for Chipboard Flooring
Glue prices can vary based on brand, type, and quality. Here’s a general breakdown:
- PVA wood glue: $10$20 per liter
- Polyurethane construction adhesive: $6$10 per cartridge
- Foam-based adhesive: $12$25 per can
- Hybrid polymer glue: $15$30 per tube
The overall cost for a typical room (around 200 square feet) can range from $50 to $150 depending on the glue used and whether both the joints and joists are glued.
Selecting the right glue for chipboard flooring is essential to achieving a long-lasting, stable, and quiet floor. With options ranging from traditional PVA wood glue to advanced hybrid polymer adhesives, homeowners and professionals can tailor their choice to the specific needs of the project. By understanding each type of glue, following proper application methods, and avoiding common mistakes, a chipboard flooring installation can remain secure and visually appealing for years to come.