In *Resident Evil 2*, unlocking hidden items and solving puzzles is a crucial part of progression and survival. One such mystery players often encounter is the Control Room locker, a small but significant element hidden within the depths of the Raccoon City Police Department and the sewers. Though not immediately obvious in importance, this locker contains valuable resources that can support both Leon and Claire during their harrowing escape. Understanding the locker code, where to find it, and how to reach the Control Room itself is essential for players aiming for full completion or just trying to survive with greater ease.
Where Is the Control Room in Resident Evil 2?
Location Breakdown
The Control Room is located in the Sewers section of the map. After completing the Parking Garage segment and dealing with the related puzzles, both Leon and Claire eventually make their way underground. The Control Room is a small chamber positioned on the Upper level of the Sewers, and it’s easily accessed once you reach the Monitor Room and begin exploring the surrounding passageways.
How to Reach the Control Room
- From the Monitor Room, head north through the Workroom Lift
- Use the T-bar Valve Handle to open the Floodgate
- Proceed through the Workroom and across to the Upper Waterway
- Enter the Control Room on the east side of the Upper Waterway
The route can vary slightly depending on whether you’re playing Leon or Claire, and which scenario (A or B) you’re progressing through. However, the basic structure of the Sewers remains consistent across campaigns.
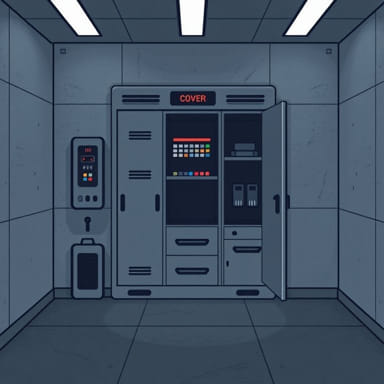
The Locker in the Control Room
Locker Purpose and Importance
The locker in the Control Room is easy to overlook due to the intense atmosphere and dark, narrow hallways of the Sewers. However, opening it grants important supplies that can be vital depending on the difficulty level and your inventory state. In Leon’s campaign, it typically contains Shotgun Shells or Magnum ammo, while Claire may find SMG ammo or other useful items.
Locker Code
The Control Room locker is a combination lock with three letters. The code to unlock it is:
- S Z F
This code works across all campaigns and difficulties. You don’t need to find the combination beforehand to input it, but it can be found organically in the game, written on a flyer posted on the wall near the Plug Socket Room.
Where to Find the SZF Code in RE2
Natural Discovery
For players who prefer to discover codes naturally rather than use a guide, the clue for the SZF combination is located inside the Sewers as well. Head to the Workroom area, and on the wall near the cable car or on a desk, there’s often a piece of paper or note containing the locker code. Reading these environmental clues enhances immersion and reinforces the idea that everything in RE2 has a narrative reason to exist.
Can You Miss the Locker?
Yes. Since the Sewers can become inaccessible later in the game depending on how far you’ve progressed, it’s entirely possible to miss the Control Room locker. If you’re aiming for 100% completion or want to gather every resource available, make sure to visit the Control Room before proceeding too far into the Lab section of the story.
Tips for Navigating the Control Room
Dealing with Enemies
The Sewers are home to some of the most grotesque enemies in the game, including G-Adults and other mutated creatures. Before heading toward the Control Room, make sure to:
- Equip a powerful weapon (Shotgun or Grenade Launcher)
- Carry defensive items like knives or grenades
- Use healing items or Blue Herbs to protect against poison
Most of the threats appear in the Lower Waterway and Upper Waterway, but they can still catch you off guard on your way to the Control Room.
Inventory Management
Because the locker contains ammo, it’s best to approach it with at least one or two free inventory slots. There’s nothing worse than unlocking the locker only to be unable to collect the contents. Also, remember to store or use unnecessary items before heading down from the Monitor Room.
Differences Between Leon and Claire Campaigns
Leon Kennedy
In Leon’s story, the Control Room locker often holds Shotgun Shells or Magnum ammo, depending on your inventory and progression. The Shotgun (W-870) becomes a crucial weapon in the Sewers, especially against tougher enemies like G-Adults.
Claire Redfield
Claire’s version of the locker tends to offer SMG ammo for the MQ11 or Pistol ammo. Although her arsenal is different, the value of the locker’s contents remains high, particularly when conserving ammo for boss encounters.
Scenario A vs B
While the SZF code does not change, you might access the Control Room at slightly different times depending on whether you’re playing Scenario A or B. In both cases, the locker remains in the same place and offers equivalent utility.
Additional Items in the Control Room
Aside from the locker, the Control Room occasionally holds other minor items like Gunpowder or a File. Make sure to explore thoroughly and check the map for item indicators that turn red if you’ve missed something. Files often contain story-related lore or puzzle hints that can be useful later.
Recommended Strategy
- Visit the Control Room early when first exploring the Sewers
- Use Eagle Eye mode (map indicators) to check for items
- Unlock the locker before the cable car ride to the Lab
Why You Shouldn’t Skip the Locker
Ammo conservation is key in *Resident Evil 2*, especially on Hardcore or higher difficulties. Missing any opportunity to gather extra resources can lead to much tougher boss fights and tight situations. The Control Room locker may seem minor, but the additional ammunition or supplies it provides can be the difference between success and a frustrating restart. Players focused on full item collection and completion percentages will also want to ensure they visit this room and interact with every container available.
The Control Room locker in *Resident Evil 2* is a small but essential discovery within the intense maze of the Sewers. With the correct SZF code and proper navigation, you can secure vital ammo that supports your journey through one of the game’s most challenging areas. Remember to plan your route, manage inventory space, and be prepared for dangerous encounters as you make your way to the locker. Whether you’re playing as Leon or Claire, this small locker offers a big payoff, especially when every bullet counts.