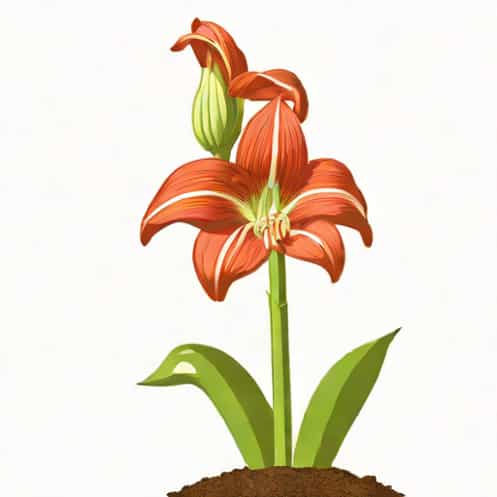
Growing amaryllis from seed is a rewarding yet patient gardening endeavor that allows enthusiasts to experience the full life cycle of this striking plant. While most people propagate amaryllis through bulbs, starting from seed offers the chance to cultivate new varieties and witness the transformation from tiny seeds into flowering plants. The process requires careful attention to soil, light, temperature, and watering, but the satisfaction of seeing your seedlings mature into vibrant blooms makes the effort worthwhile. With proper guidance, anyone can enjoy the unique experience of growing amaryllis from seed and potentially develop a long-lasting, colorful garden display.
Understanding Amaryllis Seeds
Amaryllis seeds are produced after successful pollination of the flower, typically forming in a seed pod. These seeds are flat, black or dark brown, and often covered with a papery coating. Unlike bulb propagation, seeds take longer to develop into mature flowering plants, usually three to five years, depending on conditions and care. Growing from seed provides a unique opportunity for hybridization, allowing gardeners to experiment with new color combinations and flower forms that may not be available commercially.
Choosing the Right Seeds
When selecting amaryllis seeds for planting, it is important to choose seeds that are fresh and viable. Seeds that are too old may have reduced germination rates. You can harvest seeds from your own plants by waiting until the seed pods turn brown and begin to split. Alternatively, reputable seed suppliers offer pre-packaged amaryllis seeds, which can save time and ensure higher success rates. Look for seeds that are firm, dark, and free from mold or damage.
Preparing for Planting
Before planting amaryllis seeds, prepare a suitable growing medium and containers. Seeds require a well-draining soil mix that retains moisture without becoming waterlogged. A mixture of peat moss, perlite, and vermiculite works well. Shallow trays or pots with drainage holes are ideal for sowing, as they allow easy monitoring of moisture levels and root development. Additionally, it is helpful to have a clear plastic cover or a mini greenhouse to maintain humidity during germination.
Sowing the Seeds
To sow amaryllis seeds, start by moistening the soil lightly. Spread the seeds evenly on the surface, as they require light to germinate and should not be buried deeply. Press the seeds gently into the soil to ensure contact, but avoid covering them with more than a thin layer of soil. Maintaining consistent moisture is crucial; a fine misting spray can help keep the seeds damp without washing them away. Cover the tray with a transparent lid or plastic wrap to create a humid environment that encourages germination.
Germination and Early Growth
Germination typically occurs within two to four weeks under ideal conditions, including temperatures of 70 75°F (21 24°C) and bright, indirect light. During this period, it is important to avoid letting the soil dry out completely. Once seedlings appear, remove the cover gradually to acclimate them to lower humidity. Seedlings will initially produce two small leaves, which gradually elongate as the plant develops. This early stage is delicate, so be careful when watering and handling the young plants.
Transplanting Seedlings
After the seedlings develop a few sets of true leaves, they can be transplanted into individual pots to encourage stronger root growth. Use small containers with well-draining soil and continue to provide bright, indirect light. Fertilize lightly with a balanced, diluted fertilizer every few weeks to support healthy growth. Transplanting helps prevent overcrowding and allows each seedling to develop a robust root system, which is essential for future flowering.
Care and Maintenance
Growing amaryllis from seed requires consistent care over several years. Young plants benefit from regular watering, ensuring the soil remains slightly moist but not soggy. As the seedlings grow, gradually reduce watering to mimic the natural dry period that encourages bulb development. Adequate sunlight is essential; place the pots in a bright location with filtered light, avoiding harsh direct sunlight that can scorch tender leaves. Fertilization with a high-phosphorus fertilizer can promote strong root and bulb development.
Pest and Disease Management
Amaryllis seedlings are susceptible to common garden pests such as aphids, spider mites, and fungus gnats. Monitor plants regularly and remove any pests by hand or use gentle insecticidal sprays when necessary. Avoid overwatering to prevent fungal diseases, which can affect both leaves and developing bulbs. Maintaining good air circulation around seedlings reduces the risk of mold and mildew. Healthy seedlings will grow more vigorously and eventually produce larger bulbs capable of flowering.
Flowering and Maturation
Amaryllis grown from seed usually take three to five years to produce their first flowers. During this time, the plant focuses on bulb development, which is critical for strong, vibrant blooms. Once the bulbs reach sufficient size, typically 2 3 inches in diameter, they can be induced to flower by placing them in a bright, cool location with reduced water for several weeks, simulating a natural dormancy period. After dormancy, regular watering and sunlight will encourage the emergence of flower stalks, rewarding years of patient cultivation.
Hybridization and Experimentation
One of the exciting aspects of growing amaryllis from seed is the potential for hybridization. By cross-pollinating flowers and collecting seeds, gardeners can experiment with creating new color combinations and unique flower forms. Keeping detailed records of parent plants and seed batches allows for better understanding of inheritance patterns and results. Hybrid seedlings often surprise gardeners with unexpected traits, making seed propagation both an educational and creative process.
Tips for Success
- Use fresh, viable seeds for higher germination rates.
- Maintain consistent moisture without overwatering.
- Provide bright, indirect light for optimal seedling growth.
- Transplant seedlings when they have a few sets of true leaves to encourage strong root development.
- Protect seedlings from pests and diseases through regular monitoring and gentle treatments.
- Be patient, as flowering from seed takes several years.
- Keep detailed records if experimenting with hybridization for future reference.
Growing amaryllis from seed is a fulfilling process that requires patience, attention, and dedication. From selecting seeds and preparing soil to nurturing seedlings and encouraging bulb development, each step plays a vital role in achieving healthy, flowering plants. While the journey from seed to bloom may take several years, the experience offers gardeners a deep appreciation for the lifecycle of amaryllis and the satisfaction of cultivating unique flowers. With proper care, anyone can enjoy the beauty and elegance of amaryllis grown from seed, creating a lasting addition to their garden or indoor plant collection.